
Introduction
The implementation process for Mail Aegis is straightforward, but for it to be as seamless as possible, we need to prepare to make the cut over as quick and easy as possible. The migration will be in a couple of phases – first, we need to make a few minor changes (that won’t impact your users at all). We will gather other information in the background. The screenshots in this document are for illustrative purposes only. If in doubt, don’t change anything and ask for help from someone familiar with DNS. We can also provide guidance.
MTA-STS Configuration
Create the following DNS record in your DNS Control Panel:
| Type | Name | Value |
|---|---|---|
| A | mta-sts | 77.68.124.225 |
Once you have made this change, please contact us to let us know when you are done so that we can check before we move on with the next steps where additional changes will be made. You will be notified by email when our systems are ready for the next steps.
Don't proceed to the next steps until you receive the configuration email from us.
Enable Entra Security Defaults
This is not mandatory at this time, but strongly recommended Click here to follow the guide
Create a Connector
- Go to https://admin.cloud.microsoft/exchange#/connectors
- Click on Add a connector
- Select Partner organization then click Next
- In the Name field type CyberWarden MailAegis Inbound
- Optionally add a description
- Ensure that the “Turn it on” checkbox is enabled.
- Click Next
- Select the “By verifying that the sender domain matches one of the following domains” radio button
- Enter the * (wildcard) character
- Click Next
- On the Security Restrictions Page, ensure that only the "Reject email messages if they aren't sent over TLS" and Reject email messages if they aren't sent from within this IP address range" checkboxes are selected. Enter the following IP addresses individually into the IP addresses textbox:
- 5.250.182.9
- 85.215.201.235
- 212.227.232.71
- Click Next
- On the Review Connector page, click the Create connector button, then click Done on the following page.
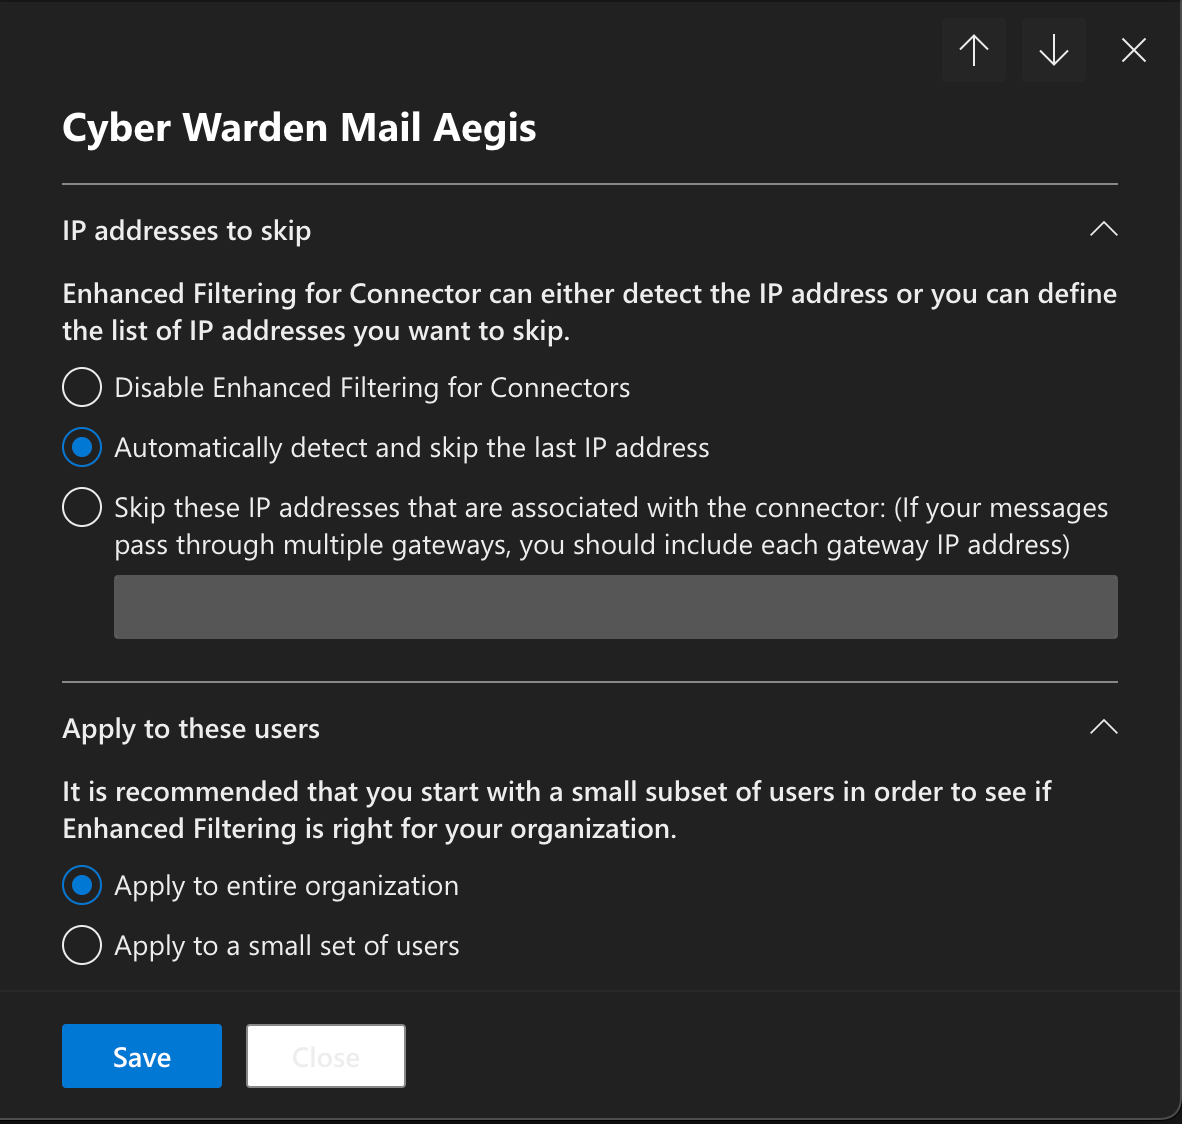
Configure Skiplisting
- Go to https://security.microsoft.com/skiplisting
- Click on the Cyber Warden MailAegis Inbound connector
- Select the Automatically detect and skip the last IP address radio button
- Select the Apply to entire organization radio button
- Click Save
Configure Basic Anti-Phishing Settings in M365
- Go to https://security.microsoft.com/antiphishing
- Click on the Office365 / M365 policy
- In the Phishing threshold & protection section, click on Edit Protection Settings
- Select the following options, then click Save
- Enable mailbox intelligence
- Enable Intelligence for impersonation protection
- Enable spoof intelligence
- In the Actions section, click on Edit Actions
- Select the following checkbox options:
- Honor DMARC record policy when the message is detected as spoof
- Show first contact safety tip
- Show user impersonation safety tip
- Show (?) for unauthenticated senders for spoof
- Show "via" tag
- Select the following dropdown options:
- If Mailbox Intelligence detects an impersonated user: Move the message to the recipients' Junk Email folder
- If the message is detected as spoof and DMARC Policy is set as p=quarantine : Quarantine the message
- If the message is detected as spoof and DMARC Policy is set as p=reject : Reject the message
- If the message is detected as spoof by spoof intelligence: Move the message to the recipients' Junk Email folder
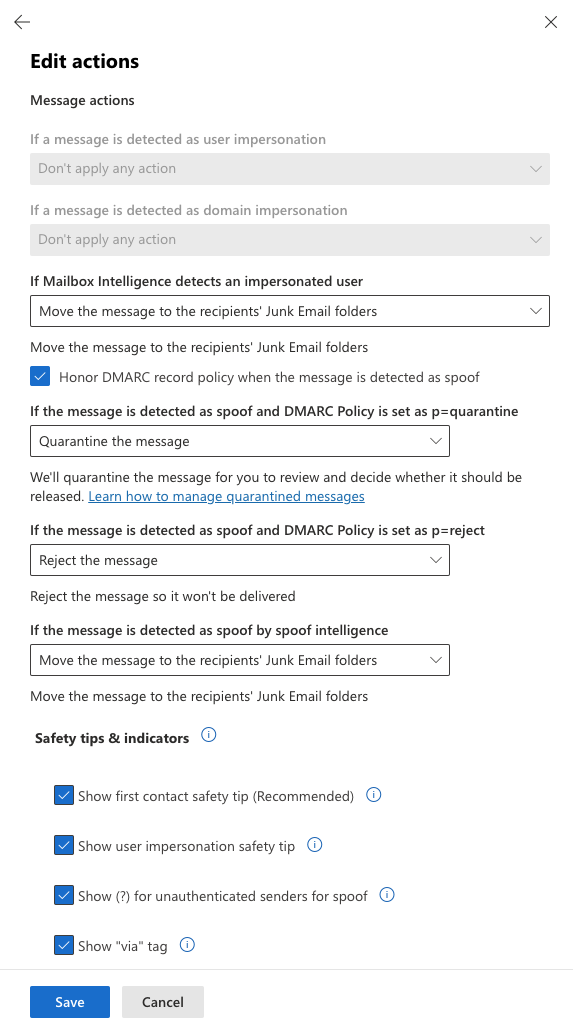
- Click Save
- Click Close
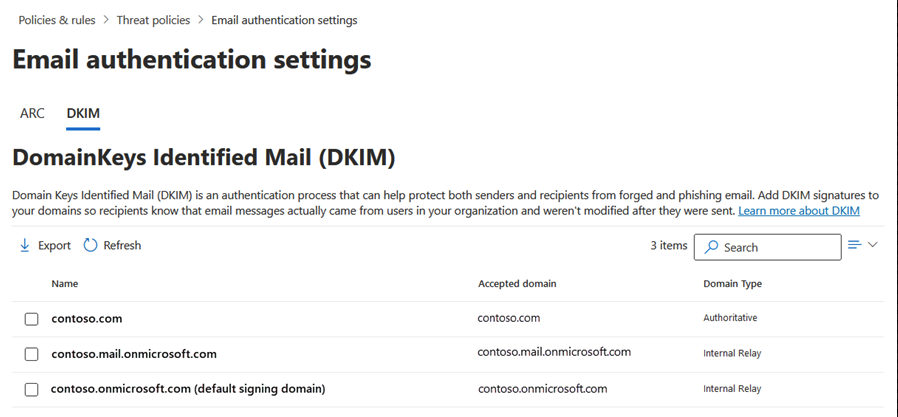
DKIM Configuration
- Go to https://security.microsoft.com/authentication.
- On the Email authentication settings page, select the DKIM tab.
- On the DKIM tab, select the custom domain to configure by clicking anywhere in the row other than the check box next to the name.
- In the domain details flyout that opens, select the Sign messages for this domain with DKIM signatures toggle that's currently set to Disabled
- A Client error dialog opens. The error contains the values to use in the two CNAME records that you create at the domain registrar for the domain.
- In your DNS Control Panel, create the DNS records as displayed in the domain details flyout. Leave this flyout open.
| Type | Name | Value | TTL |
|---|---|---|---|
| CNAME | selector1._domainkey | value from flyout | default |
| CNAME | selector2._domainkey | value from flyout | default |
- After a while (try after 5 minutes, but this might take longer - in rare cases unto 48 hours), return to the domain properties flyout that you left open in Step 6 and select the Sign messages for this domain with DKIM signatures toggle. After a few seconds, a security dialog opens.
- After you select OK to close the dialog, verify the following settings on the details flyout:
- The Sign messages for this domain with DKIM signatures toggle is set to Enabled .
- The Status value is Signing DKIM signatures for this domain.
- Rotate DKIM keys is available.
- Click Close.